Friday, June 29, 2012

Fiddly Knitting

For the longest time I didn't even want to attempt cables. They looked so fiddly and really kind of hard. Eek?! A cable needle? I can barely handle working with DPNs! What the heck am I going to do with a (gasp) cable needle?  Sounded like a sure way to lose an eye!
I guess  I was pretty content to just knit and purl and maybe ocasionally throw in a fussy sort of stitch (ugh bobbles...) but I wasn't willing to make something with cables. Nope. Didn't want to..until I saw someone creating with them.  That someone just happened to be my backhoe buddy AND I had  taught her (pretty much forced her) to knit!  Um. Yeah. Nothing like a little healthy competition to spurn me into action! Sometimes that's all it takes and I'm off and running! Or in this case..... cable~ing!
Well BB (Backhoe Buddy) told me cables were easy and not intimidating and of course I could do it. Whatever.  I resisted. Quite a bit at first, but once I saw where she was going with these (read.. not wanting to be shown up...) I tried.
 Well.... she's right. Yeah.... that hurts to say it out loud, but she was right in this one and only  instance.
Cables are fussy and fiddly, but once you get the hang of it you won't even need a cable needle!
Which may be a bummer for Royal D & Princess' Momma.... but I think even they will like cables!
I'm working on my second block #2 in the portable projects with a cause.... you should almost be there I think and this means CABLES! Woo hoo! C'mon! I can do it so that means you can too!
My second version of block #2 is in solid red. I like how it looks in a solid rather than the variegated blue I used for the first time around.  Solid colors will make your cable work POP out!
The cable stitches in the pattern read like this:  AND I can hear you saying.... WHAT? REALLY? WHOA....
*Special Sts*
 6-st RC (3 over 3 right cross) Slip 3 sts to cable needle and hold in back, k3 then k3 from cable needle
6-st LC (3 over 3 left cross) Slip 3 sts to cable needle and hold in front, k3 then k3 from cable needle. It's pretty simple; honest. Just ask BB she'll tell you.... but to help you along the way I'm showing you how I did it. *sorry but Boy is using the video camera so I got stuck with the regular one!


For this pattern... purl the first 6 stitches... slip the next three onto a cable needle (the darker needle) and hold it in back (Right cross), knit the next 3 stitches off of your left needle. Slip the stitches on the cable needle back onto your left needle and knit them.

Next you will do the next 3 in the cable section... the 6-st LC (3 over 3 left cross).  It's easy.. you just did the RC right?! Slip the next 3 stitches onto the cable needle (purlwise is easier) and hold them in FRONT... then knit the next 3 stitches off of your left needle...

Now you slip the slipped stitches (those on the cable needle?) back onto your left needle and knit them! Just like you did before... only difference is where you held the slipped stitches! Back or front! That's what makes the cable twist this way or that way! It really means more fiddly farting around... but it will work out !  That's how we get the 'twist' into the cable!

 Now you purl the next 6 stitches (that center portion) and repeat the cable process for the left side! Just follow the pattern for the remaining rows and repeat the cable section as directed! You only have to do it six (?) times for this block?
It's kind of cool how it looks like you put a whole lot of effort into your knitting fabric, but really you don't. Just twist 3 stitches this way, 3 that way... a couple of times this way, a couple that way and with the purl stitches helping it all pop out.... you made some amazing knitting!
Go you!!
Seriously......... go you! Get some blocks done!!


Thursday, June 28, 2012

Fiche Tricot

How about some language lessons? A little langue francaise un jeudi matin?
 A little French language on a Thursday morning! Really! That's what I said...

I've been working on the en tricot afghan de project (knitted afghan project) and needed a way to organize the fiche tricot (knitting pattern)....somehow (insert snorting laughter)  I got off of that project and onto French lessons (rapid descent into space...) and really felt I should combine the two together! I really think I just needed an excuse to sit at the computer for another hour rather than getting work done, but... I'm learning something!
**The Cupcakes are busy working on a second language (home schooling at it's finest!) because Big is opting for a new assignment and the French language will be a big part Cupcake world here pretty soon!

Putting (the giggleometer) another part of my brain to the test.......

I needed a way to make my latest (I am so giggling putting these words together!) a little more portable without carrying an entire fiche tricot (knitting pattern) or even using my ordinateur portable (portable computer) so... I had to come up with a systeme d'exploitation (organizing system) to carry my fiche tricot!
Wow huh? I know, I know, what a tangent for a Thursday morning (un jeudi matin) !!

It all boils down to this.... systeme d'exploitation...
Make that big pattern into something portable so it fits into my cutesy-schmootzy tricot sac (knitting bag) and make it so I can spill stuff on it, drop it in the pool....
I printed out the pattern again, this time making sure that I printed only one one side of the paper. I then cut out each pattern for each square (un carre') and then laminated it! Each carre' is not exactly square, but it's close! A little paper punch action and a ring.... voila'.. lovely portable fiche tricot!
Off to the pool I go........... and yes. I'm still giggling and trying to fit langue francaise into my daily adventures... maybe I will be a francophone?!!

Wednesday, June 27, 2012

Portable Projects with a Cause Take 2

Here is the plan kids! Once a week I will post a pattern for one of the six squares for the afghan project!  I know, I know... it hasn't been quite a week since I posted the idea last Friday (yeah, yeah...) here is the LINK for block #1 AND at the bottom of this page is the pattern for block #2.
Once you have the pattern, knit it up in ANY washable worsted weight yarn you wish *do try to make it washable because it is a charity project and who knows where it will end up! **I have yarn we can share**
I think it's a great idea and I'm hoping you do too! It fills a lot of my summer knitting needs... it's small, a little challenging (to keep me interested) but not so challenging I won't do it (a sweater) and small enough to take wherever I go! Portable Knitting with the added benefit of doing something for someone else!  When we have all the squares completed, and it's stitched and bordered together, off it will go to a charity we all agree on!
I'm really trying to hold myself back and not just whip through the whole thing because so far, block #1 and #2 have been pretty simple!  AND I'm super excited about learning some of the techniques in the following blocks!  I am going to wait for you all  catch up and will only knit the square that I've posted for that week!  I WILL! I promise!   Patience... yeah... not one of the strongest parts of me!
Because I'm so anxious and we did (I did anyway) start last week,  I've made block one (twice) and block two once, BUT because I don't want to get too far ahead, I'm working on another block one!  I promised I wouldn't work ahead so I'm just going to make more of the blocks for the week!  I will be posting block #3 next Wednesday!!
Big Bamboo aka Block #1
This is my block #1, Big Bamboo. They look completely different sizes and shape, but with a little blocking these should measure out to the right size...
 I just reached into a bag of yarn that I have and pulled out a ball.... no thought at all went into the color choice!
 Block 2 ~below~ is made out of the same stuff and  would totally be better with a solid color. Sigh... I have a week to make it as many solid colors as I can...  I wanted to use up the ball that I had and now that I've used it up, it's  back to the bag of randomly placed yarn I go! Woohoo!!
Block #2 aka Horseshoe Cable
Honest! I didn't choose any of the colors that went into the bag! It was a bag that was given to me by a friend of a friend (Thanks DB!)  and although I did make sure it was all worsted weight... I DID NOT plan the color scheme!
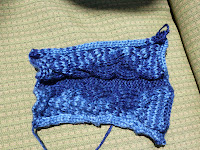
Block #2 is the Horseshoe Cable. I did mine in a worsted weight, verigated yarn using size 8 needles. Next one is going to be done in a solid color so I can actually see all the work I put into the cables!
It's a bit more advanced... it has cables but really it isn't that bad! *If you don't have a cable needle, just use another needle of the same/similiar size.... a dpn will work great!

HORSESHOE CABLE
Multiple of 18 sts +6
*Special Sts*    6-st RC (3 over 3 right cross) Slip 3 sts to cable needle and hold in back, k3 then k3 from cable needle
6-st LC (3 over 3 left cross) Slip 3 sts to cable needle and hold in front, k3 then k3 from cable needle.
*************
Cast on 42 stitches
Knit 2 rows
Row 1 (RS): P6, *k12, p6; repeat from * across.
Row 2: k6,  *p12, k6; repeat from * across
Row 3: p6, *6-st RC, 6-st LC, p6; repeat from * across
Row 4: k6, *p12, k6; repeat from * across
Row 5-8: Repeat Rows 1 and 2 twice
Repeat Rows 1-8 until piece measures 10"/25.5cm from beginning, end with a WS row
Knit 2 rows.
Bind off.

This is going to be a great way for all of us to work together on a project for a good cause and learn some new stuff along the way! There is some intarsia, color-work and even an eyelet lace coming up!
(HERE is link for the block from last week!)

 ~HAPPY KNITTING ~